Back
TPC V3 Modding
Last updated Monday, June 16, 2008
1,400 wordsSo, you want to customize Taspir Power Complex to be your way? I'll try and help you through it as best I can. Mostly, all you can do is put your clan's logos in and change the pictures in the bedrooms, as well as deactivate certain *cough* annoying functions. *cough* Not that I would have anything to do with that...
But you came here to mod for TPC. To start, download this zip file. It is the basis of all TPC mods.
TPC_V3_mods.zip
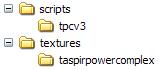
Inside that ZIP file, you will find a textures folder and a scripts folder. Inside the textures folder will be a taspirpowercomplex folder, and inside the scripts folder will be a tpcv3 folder. Leave these alone - do not change the order of things, and do NOT rename anything. It has to stay as-is. This is what it should be:
Here comes the fun stuff.
Clan Logos
To put your clan's logo into TPC, you will be saving over the blank logo files with your own logo. The three files are:
There is a trick to this, though. You MUST keep the image sizes the same as the originals. logo_large.JPG is 1024x1024, logo_medium.JPG is 512x512 and logo_text.JPG is 512x256. You must understand this for it to work.
EVEN MORE IMPORTANTLY:
you MUST save your images as BASELINE JPGs. (If you don't know what that is, you probably are already saving it as one, so you have no need to worry.)
The second thing is that black turns invisible. If your logo isn't square, no problem - just turn the background black and it will all disappear! This should help you get some nice results.
The last thing you should understand is that the different logo files should have different logos in them. logo_large should be a full-sized logo, logo_medium should be a normal logo (maybe missing a few fancy things) and logo_text should be your clan tags, all in text.
Got it? Here's an example.
logo_large.JPG:logo_medium.JPG:
logo_text.JPG:
Just save your images over the ones in the textures/taspirpowercomplex folder and they should work.
Got it? I hope so! If this is all you wanted to change, skip to the bottom of this page for instructions on making this into a PK3. You do not need to download any software if you're running Windows XP or higher.
Bedroom Pictures
The bedroom pictures are the same as the clan logos, just without the transparency. I'll list the requirements again, in case you skipped the logos:
- You must save your images at 512x512.
- You MUST save your images as BASELINE JPGs.
(If you don't know what that is, you probably are already saving it as one, so you have no need to worry.)
Now, you're probably wondering how you're going to know what pictures are what. I'm not going to make you guess - I have a map made for you. It's a little tough at first, but it's easy to understand. Here it is:
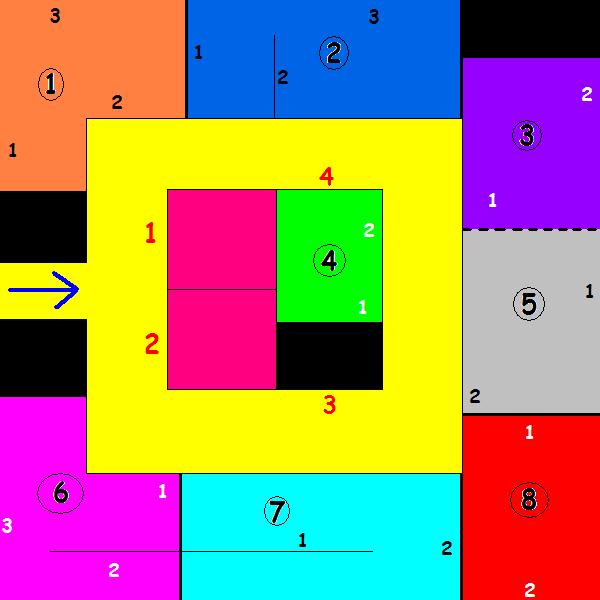
Yes, I know it's out of proportion, just...pretend. MS Paint for teh win. :P
The blue arrow indicates the entrance to the clan area. The yellow area is the hallway that goes between the rooms. The big, red numbers in the hallway are for the "clan_area" pictures. The big, black, circled numbers are the numbers of the rooms, and the smaller numbers are the numbers of the pictures inside that particular room. So if I wanted to change the TV in room 6, I would save over the file "room_6_pic_1.JPG" with my own picture. Also, if I wanted to change a picture in one of the hallways, say, picture 3, I would save over "clan_area_pic_3.JPG".
For the best results, you may need to stretch your images like mine are. In case you haven't noticed, a few have black lines on the left and right where I shrank the width of the image. It will appear un-stretched in the map.
Also, you can change the plates outside the rooms to correspond with clan members' names. If I wanted to change the plate on room 7, I would make a 256x128 JPG file with the person's name, then save it as "room_7_plate.jpg"
Basically, whatever you overwrite, save it as a regular JPG with the same dimensions.
You can also change the billboards. Save a 1024x512 JPG file as "billboard.jpg" and put that into your ZIP file as well.
Got it? I hope so! If this is all you wanted to change, skip to the bottom of this page for instructions on making this into a PK3. You do not need to download any software if you're running Windows XP or higher.
Deactivating/changing buttons
Script mods are really, really cool. There is only one downside - the server you are playing on must have the scripts. You can do all the script changes you want, but if the server you're playing on doesn't have the changes, you're out of luck.
The following script mods will let you disable certain features of this map.
Below is a list of the changes. All scripts that you download will be a .IBI file. This file will go into the zip file you downloaded above, and you'll need to put them in the scripts/tpcv3 folder.
Click a script option below to download it.
- Remove auto-heal from "Betsy"
- Deactivate "Clear MCR" button
- Remove lava flood from FFA maps
- Remove lava flood from Duel1 and Duel1_night
- Remove the rickroll
- Add the light-up words to the rickroll
- Change the "Clear MCR" button to a rickroll
- Remove the rotating center.
- Deactivate the "lava state" function
- Deactivate the "unlock all bedrooms" buttons.
- Make the dividing wall between bedrooms 3 & 5 start open
-
Deactivate the button to operate the dividing wall between bedrooms 3 & 5
(you can use this and the script above together to make it permanently open) - Free MCR access
- Free spawning room access
- Disable MCR (cannot be used with free MCR access script)
-
Lastly, if you want to remove the timescale buttons you will need the following two scripts:
slow_speed.ibi
slower_speed.ibi
Also, since I'm sure some people are curious, I'll give a few of the source files for the scripts out. I can't say my coding is very good, but it works. Maybe this will help people learn how it's done. I look forward to seeing more maps with rick rolls in them. (Feel free to use these scripts in any way you want) :]
Script source files
Got it? I hope so! If this is all you wanted to change, continue on for instructions on making this into a PK3. You do not need to download any software if you're running Windows XP or higher.
Making a PK3
Making your PK3 is actually pretty easy. Most people seem to make it into something it isn't. Here's how (this is made for Windows XP - Vista will be different).
The zip file that you downloaded above is your pk3, all you did was modify it's contents. To make it a pk3, you simply need to change the file extension to .pk3 instead of .zip - very easy.
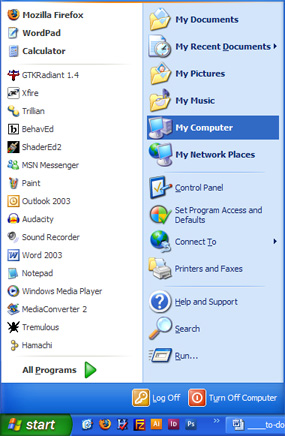
The only problem is that Windows automatically hides the file extensions for files it recognizes, so you need to display them. To do this, open up My Computer.
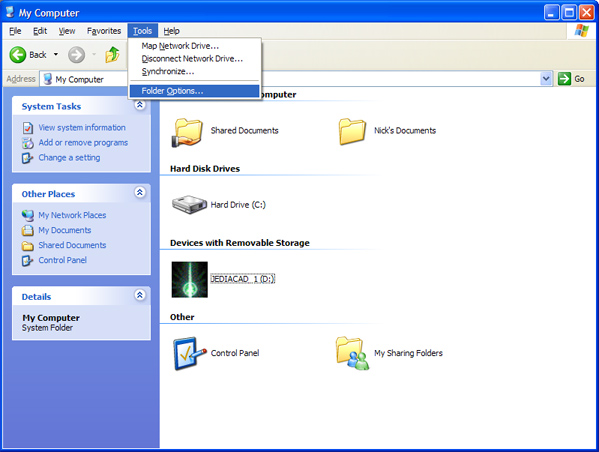
Go to the tools menu and select "Folder Options..."
A box will pop up. Click on the view tab.
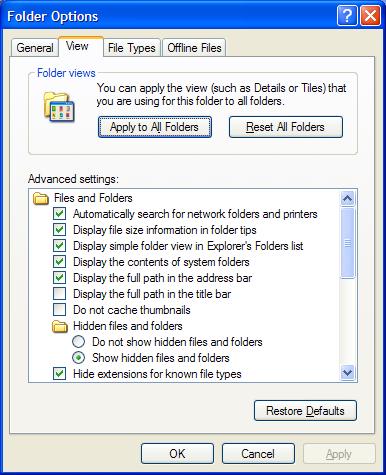
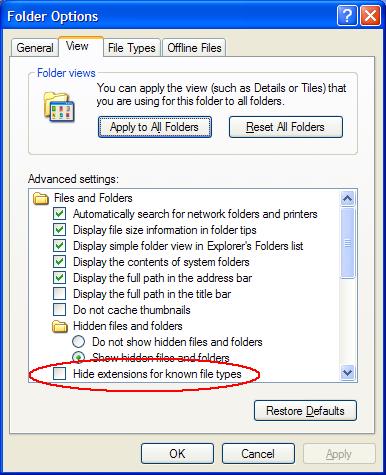
Make sure the "Hide extensions for known file types" box is unchecked.
The rest of this is a piece of cake - select the zip file you've been modifying with your pictures, and push the F2 key on your keyboard. Type in this name: "TPC_V3_mods.pk3" (it MUST be exact, or the changes may not work). then hit enter. You will see this pop up:
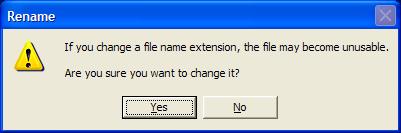
Don't believe windows, just click yes.
You now have a PK3! Put it in your Base folder and you're ready to go! Send it to all your friends and have them put it in their base folders. I would suggest uploading it to FileFront or something similar and sending a link to your clan/friends for easy sending. Have fun!